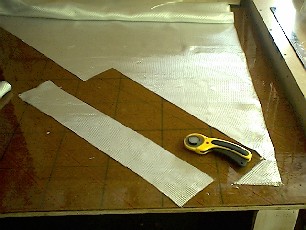
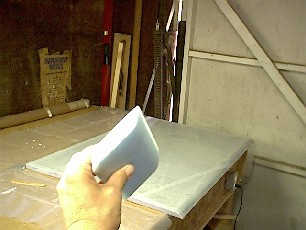
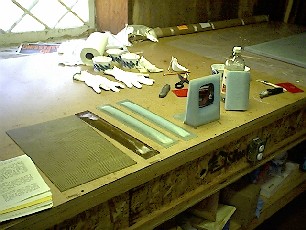
Have some pictures now, the $60.00 PhotoPhaser seems to work pretty good, still getting the hang of it. I think it definitely works better in ambient light then with the flash.
Managed to do one of the practice lay-ups, 6 plies of BID. This came out pretty good, the weight came out to 11.7 oz which fell within the prescribed limits of 10.5 and 12.5 oz's. One problem was that the wax paper I put down to protect the table was some old stuff which was wrinkly, and ultimately duplicated itself on the backside of the lay-up. I also used masking tape to tape the wax paper together thinking that the epoxy would not stick to it, wrong, I think the only thing that epoxy won't stick to is duct tape, wax paper, saran wrap and visqueen plastic. Although the lay-up came out to the correct weight and there were no major air bubbles, if you look really close you can see a few white flecks, which I believe are very small air pockets. Chapter 3 in the plans describes flaws to look for in lay-ups and describes the white flecks of air. "Assess carefully if any evidence of air in the layup is present (white flecks, bubbles, air at the foam face). If the dryness evidence is more than 10% of the area, the part MUST be rejected" Well I don't think these flecks could add up to 10% of the area but I would like to prevent them from occurring in the real parts. The epoxy was nice and warm, 100 F, the shop was at least 85 F and I wetted out each ply of cloth individually. So, I'll just have to be more vigilant when wetting out the cloth and look to see if I can spot these very small flecks of air during the layup process. I definitely can improve the lighting over the bench and maybe I'll use a hair dryer to keep everything warm during the layup. (The white in the picture is not dry areas but just a reflection of the camera's flash, it does show that the layup is epoxy rich in the lower right corner since the flash isn't reflecting off the weave of the fabric.)
John
Slade later emailed me and assured me that the white flecks are pretty
normal and are what cause the dreaded surface pin holes that make the finishing
process such a nightmare. He recommended the plastic peel ply method
to prevent the pin holes which is also what they teach in the EAA Sport
Air Composite workshop. The plastic makes squeeging out the epoxy
much easier, you're also able to see any air bubbles much better and it
prevents disturbing the fabric. So I plan to use the plastic
over the layups whenever possible and limit the use of the Dacron peel
ply only where sanding is needed. According to Chapter 3 the Dacron
peel ply will cause the weave of the fabric to be overly filled with epoxy
causing a heavier part.
Isn't this group great, first Rick is giving you free web space and
then John, who's practically finished with his airplane, is looking over
a newbie's website to make sure they're doing all right. Thanks Guys!
This
is the epoxy hot box. Its got the bulb, thermostat and thermometer
keeping everything at 100F. Also insulated with some 1/2 inch foam
insulation from Home Depot, about $6.00 for a huge sheet, 4X6, I think.
So far I rarely see the bulb On, unless I play with the thermostat but
the thermometer is reading a pretty steady 100F so I think it's working
pretty good. The epoxy is what came in the practice kit and what
I had left over from my kayak. I put them in plastic bottles that
had pour spouts. I bought a digital scale and that's what I'm using
right now to ratio the epoxy, but I have an epoxy pump ordered with the
first shipment of materials. I also built the wooden scale in the
plans, haven't used it, but thought it was kind of tradition. Maybe
I'll use it to check the digital scale and the digital scale to check the
epoxy pump. Yeah right.
Got a good start on the cloth cabinet, had some trouble with the door
which doubles as the cloth cutting surface. I wanted to make a smooth
cutting surface so I laminated the plywood door with masonite. I
also drew lines at 45 degrees and 90 degrees to help orient
the BID cloth when it comes time for cutting at the prescribed 45 degree
angle. The trouble came when I followed the plans recommendation
of putting a coat of epoxy on the cutting surface to prevent the cloth
from snagging on anything, I also thought this would create a hard surface
preventing slicing the masonite when using the rotary cutter. Well,
apparently the masonite must have a wax coating or something because I
ended up with lots of little epoxy craters. So after it cured I sanded
it, cleaned it with rubbing alcohol and put another coat of epoxy, which
came out relatively smooth. Another sanding and coat of epoxy should
do it.
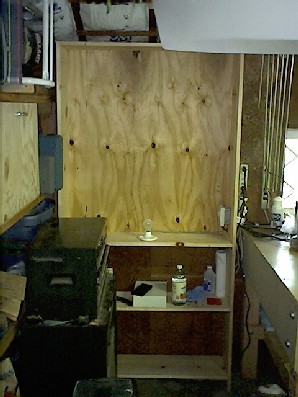 The cloth cabinet still waiting for the door/cloth cutting board to be
hinged on. I decided to put a bulb and thermostat in the cabinet
as well, the plans recommended that it would help keep the cloth warm &
dry. Cheap and simple to do.
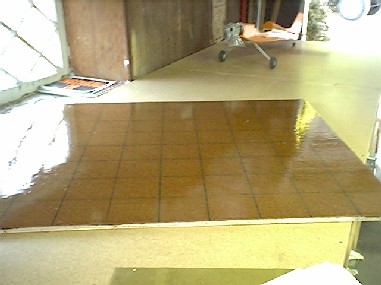 Here's
the cutting board that will act as the door for the cloth cabinet, a little
difficult to see the 45 degree lines, they are red. Coated the masonite
with epoxy to create a smooth hard surface for the rotary pizza cutter.
This is the work bench measuring 4 X 12 feet, used four TJI floor joists
to make sure it wouldn't sag over time, also put adjustable bolts in the
legs to make leveling easier, the Smart Level indicates within a 1/10 of
a degree level. I can't remember who's web site I got the floor joist idea
from, but Thank You! I'll figure out who you are. Wouldn't
you know it, I got the floor joist idea from Rick Maddy's site. Thanks
again Rick! Oh, the table also has a sheet of masonite on top
for easy replacement when it gets too messed up with epoxy. I used
drywall screws to hold it down, I thought the screws would pull down below
the masonite surface but masonite is harder than I thought so I contersunk
all the holes to keep the heads of the drywall screws from snagging anything.
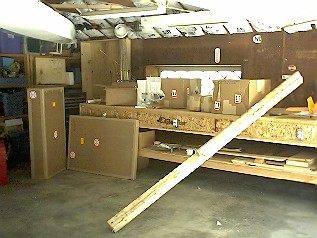
On Friday (7/26/02) received my first order of materials which should
be enough for Chapters 4 thru 8, doesn't seem like enough to build a fuselage
tub. Much to my surprise the rolls of cloth were too wide for my
cabinet. I asked Wicks for the dimensions and was told 37 inches.
Well they are really 39 inches wide and with the shifting of the fabric
on the roll and the width of the cardboard tube it's really 40 inches,
which was the outside dimension of my cabinet and was all the space I had
because of an electrical outlet that was in the way and the length of my
table. Thanks to my brother-in-law, Erik, who happens to live next
door and has almost as many tools as Norm Abrahms, we were able to widen
the cabinet with a few passes on the table saw and a few biscuit joints.
The cutting board/door I could still use by turning it sideways and adding
a spacer at the top of the cabinet. We
also moved the electrical outlet to get it out of the way and we're back
in business.
 The epoxy pump also presented a problem, it was too
tall for my hot box. I really didn't know how tall it would be but
made my hot box to fit in my garage shelves which I thought would be more
than tall enough, wrong! So I will just build the hot box into the
shelving and that will give me enough height, I only needed about a half
an inch. The pump is about 17.5 inches tall, so you need a
little more than that to get it in and out to refill it. Check out
Rick's Web Site
he provides really good specific information for the prebuild shop items.
Well I don't think I've heard of anybody having to redo the prebuild shop
stuff. Oh well, now I'll be sure to know the dimensions of everything
before I start cutting and gluing.
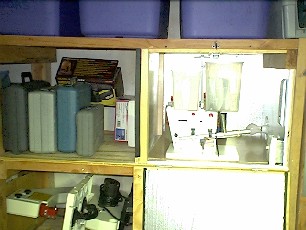
Well it's been awhile since making any progress. Went on a camping trip for four days in the Redwoods, along the Northern CA coast near Crescent City, beautiful country, also making preparations for having a new roof put on the house. But, I think I have my shop in order now, got the bigger epoxy hot box built and attempted another practice layup, "The Confidence Builder", well it didn't give me much confidence. This is the first time you cut the BID cloth on a 45 degree angle, essentially a 4 inch wide strip 22 inches long. The cutting is OK but try to lift it up, boy does that stuff want to move around, if you pick up one end it will just start growing longer and get skinnier and I saw this on the Rutan video tape, but I had no idea. You can pull it back into shape but that's if you know what the dimensions were when you started, I cut the strips approximately at 4 inches wide it all gets trimmed later anyway so I didn't make it exact. Well after a lot of fiddling around I got all the strips so that they were approximately equal in width and layed up the 2 plies of UNI and 2 plies of BID. Then I made some micro slurry and painted the foam core and pressed it onto the 4 plies of UNI and BID, then I noticed the ends of my foam core and was wondering how I would glass these vertical cut-offs. Looked at the plans, oh there is supposed to be a nice sloping taper 3 inches from the end. Got out the butcher knife and proceeded to make the taper and the whole 3 inch end of foam broke off. Well this makes it easier to trim, anyway, glued it back on with some micro slurry trimmed the other end a little less aggressively and proceeded laying up the upper 4 plies of UNI and BID. Well I had bubbles everywhere, the more I tried to work them out, the more distorted the cloth got. So I tried heating it with my heat gun (hobby shop heat gun for shrinking monocote for model airplane covering had it on low but that still may be too hot, might get the recommended hair dryer) being careful not to add too much heat, that did help but I still had a lot of trapped bubbles stippled with a brush adding epoxy to fill the bubbles, I think this part is going to weigh ten pounds. Also the top plies of cloth wouldn't stick to the bottom sides of the foam. So I tried the Saran wrap technique I read about in chapter 3 to help hold the cloth down in sharp corners. I think my Saran wrap was too thin because it was really hard to work with, it would wrinkle and tear when I tried to squeegee out the air bubbles. The shop temp. was also only 70 degrees which may have made wetting out the cloth more difficult. For these practice layups I'm using EZ-Poxy that came with the practice kit, I'm thinking that the MGS (that I will be using for the airplane) will be better since it's reported to have a very low viscosity making it easier to wet out the cloth. If I do this over I will use the MGS since I need to load up the epoxy pump and see how that works. I'll trim the piece and after the 48 hour cure do the strength test.
(8/21/02) I did load up the epoxy pump (Adjustable Sticky Stuff Dispenser, SS-ADJ,Michael Engineering) with MGS 285 and found that the resin being pumped out had a small black cloud of contamination. Even after pumping about 6 oz's it would still emit some black into the resin. I called Michael Engineering and spoke with Rob who reassured me that this was just fine aluminum particles from the pump body bore and would not affect the strength or curing of the epoxy. He recommended that I use it, do some practice layups and if I still was not happy they would work something out. I searched the Cozy Builders email archives using Rick's search engine (Keyword: epoxy / From: Doug Shepherd) and Doug had experienced the same phenomena about two years ago, he thought the black stuff was caused by assembly grease,(he had read it in the pump instructions, mine made no mention of it) but he has had no problems. I'll use it for the rest of the practice layups and see how it goes. The pump was preset for a 100/50 ratio by volume which is a 100/40 ratio by weight for the MGS 285 epoxy and it was exact for both measurements, I was amazed.
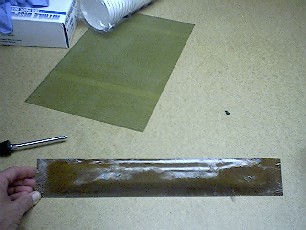 This is what the "confidence builder" ended up looking like, not pretty, a lot of wrinkles from the Saran wrap, but much to my surprise there are no bubbles and it feels pretty stout. I'll test it in a day or so. I'm still going to try this practice layup again.
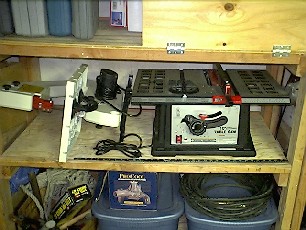
There has also been some new shop equipment acquisitions, complements of my wife for my birthday. Because I'm so limited on space the new bench top 12" band saw and table saw (10" blade) will be handy since I can store them away on a shelf when not in use. These are from Harbor Freight and work well and are relatively inexpensive. Both cut the foam very nicely and the band saw makes beveled cuts and trimming cured glass easy. The table saw will also be used for cutting wood for jigs and fixtures. The only minor squawks are that the band saw table is not perfectly flat, which made setting it up to be perpendicular to the blade difficult, I set it so that the area closest to the blade is perpendicular,when I have some time Iíll try to flat file it. On the table saw the slot for the miter gauge is a little too wide for the miter gauge guide so there's some slop, making it little more difficult to keep your work piece perpendicular to the saw blade when cutting. Since these tools will be used primarily for cutting foam and trimming glass precision isn't too critical, well at least not yet.
Well I've done the confidence layup three times (they all passed the structural test), the bookend and a miniature seat back and I'm now fairly satisfied with my abilities to mix epoxy and getting it all over everything and soak up the whole mess with some glass cloth, which I happen to have a couple of hundred yards worth. Anyway I think I'm ready to graduate and make some bigger messes, as you can see the first seatback layup in the background.One tool I've found really useful is the rotary cutter for cutting the cloth. I bought it thinking I wouldn't use it much but it is absolutely fantastic, it cuts so cleanly without distorting the cloth at all. I use the expensive Weiss scissors for trimming the layup to within a 1/4 inch of the foam before letting cure.
