
So the engine installation starts with fabricating flanges on the fuselage bottom, turtleback and wings for the engine cowls to attach to. I picked up the engine cowls in June after attending the Columbia - Canard West Flyin. It was just another few hours drive further North to Ukiah, CA to pick them up from Ross Burk at Aero Composites, beautiful vacuum bagged cowls, and saved quite a bit on shipping.
Happy Holidays & Wishing You A Great 2026!
 I started out drilling the holes in the firewall to mount the engine mount. I added some plies of BID in certain locations to make the pads flat an level with the mount. You drill one hole and then use the engine mount as a drill guide for the other three holes. So the location of the first whole is critical to be at the right height and distance from center. I used my laser level to make sure it was level. The holes came out fairly well centered in the aluminum pads on the interior side of the firewall.

 Five minute epoxied blocks of foam to the firewall for the top and bottom flanges. It was a little challenging to avoid the fuel tank vent lines. If I were to do it again, for the top flange I would only have a foam block on the flat top portion because it's not likely that the curve of the turtle back corners will match the cowls, at least not for me. I had to cut the corner portion of the flanges off and sand down the 5 plies on the turtleback. Once you secure the cowl with cleco's to the top portion you can glass the flanges following the contour of the cowl. The bottom corner flanges matched the cowl fairly well but I still needed to cut and sand some portion of the flange off so there wouldn't be a gap between the flange and the cowl. As Andrew Anunson advised, "it's better to make the airplane match the cowls that way you won't have to micro the cowls to blend gaps and micro on the cowls will crack due to the flexibility". So I glassed the flanges with 5 plies of BID and removed the foam blocks.
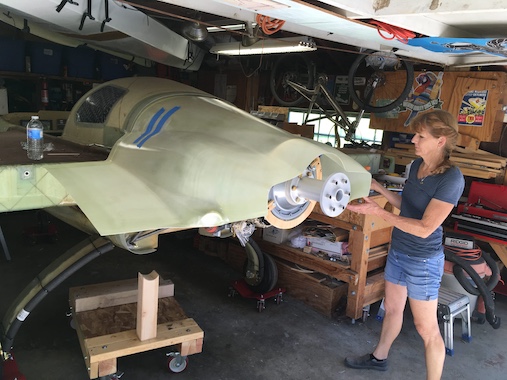
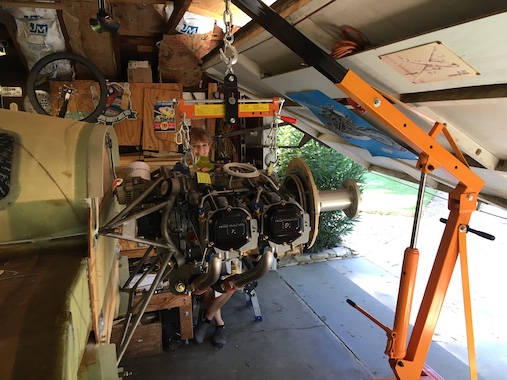
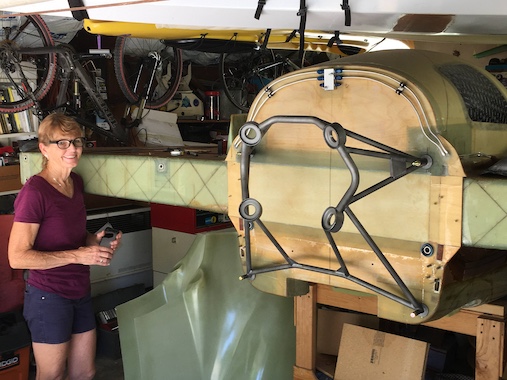
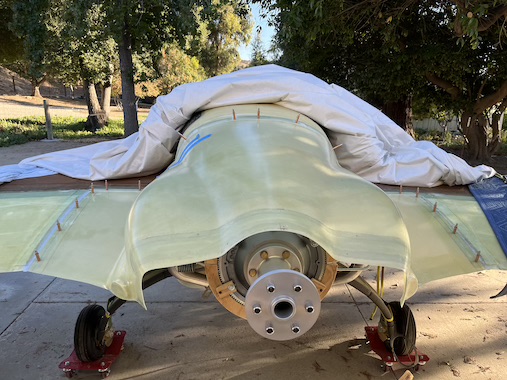
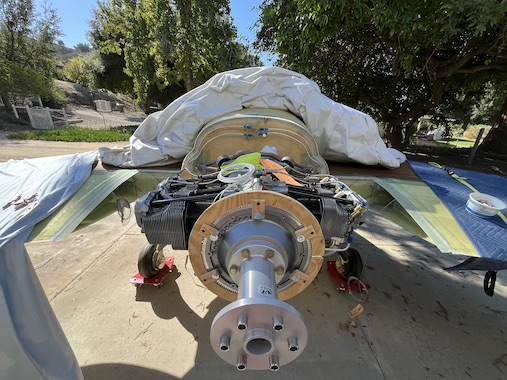
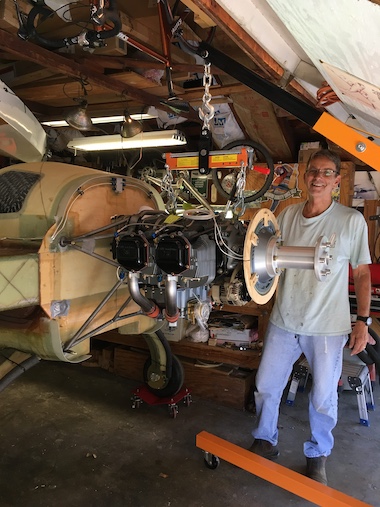 So it was time to mount the engine to the firewall to see how the cowls fit. The plans call out a 1 1/4" clearance between the starter ring gear and the cowls so I made plywood ring and attached it to the ring gear to ensure the required clearance. Also you can see the 8" prop extension from Saber Tech bolted to the ring gear.

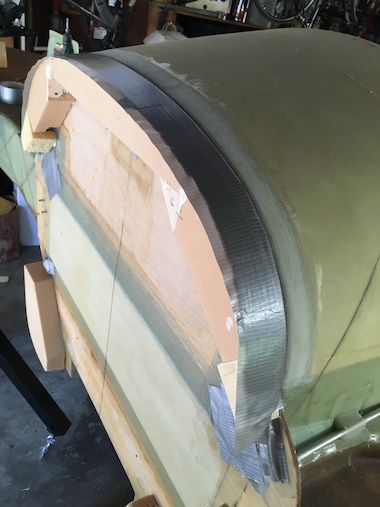
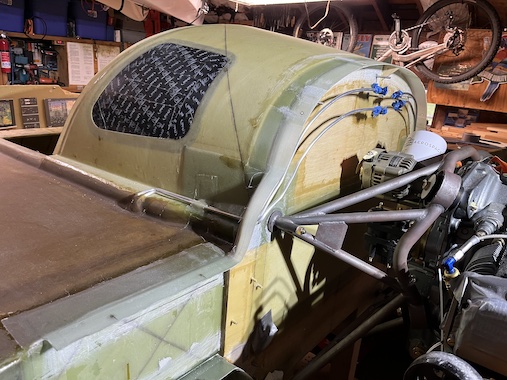
 The upper cowl gets a stiffening rib floxed in near the trailing end of the cowl, held in place with cleco's. The flanges over the turtleback and lower corners were done (except for the additional four plies along the inside) so it was time to bolt on the wings to fabricate the flanges along the wing roots and center spar.
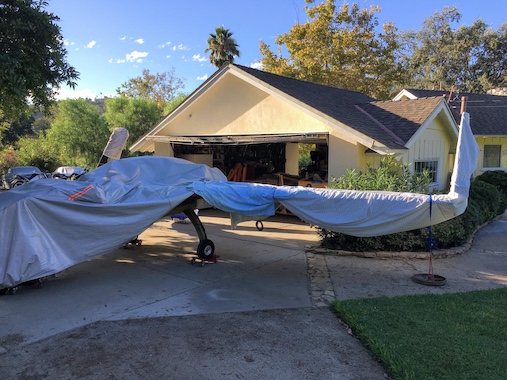
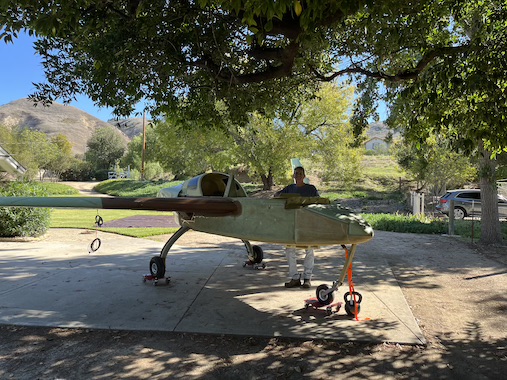
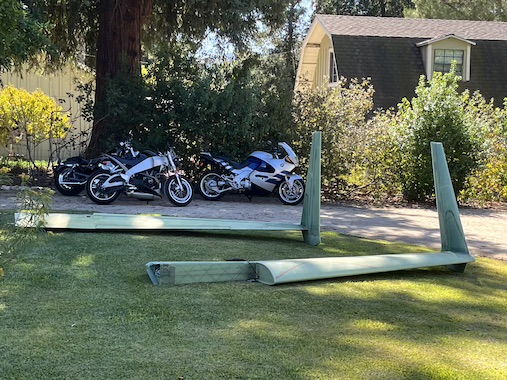
 Not enough room in the garage with the wings on so had to keep the airplane outside while doing the wing and center spar flanges. Found some old car covers and sheets to protect it from the sun. The UPS driver asked if I would fly it out from the backyard.
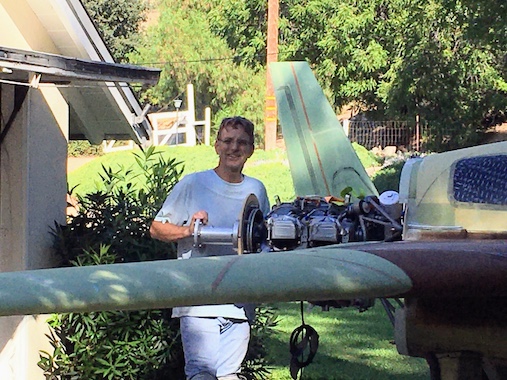
 I'm so grateful for Lynn helping in every way possible, every large layup and a lot of the small ones, bolting wings on and off several times and moving the plane, even flipping it upside down.
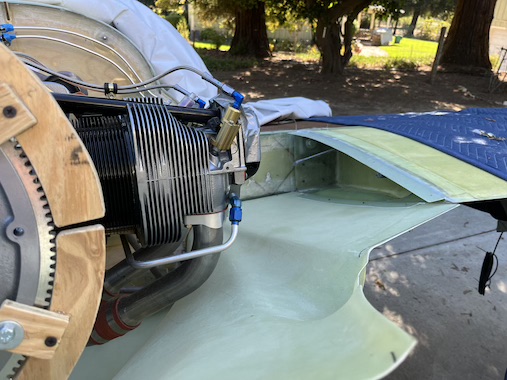
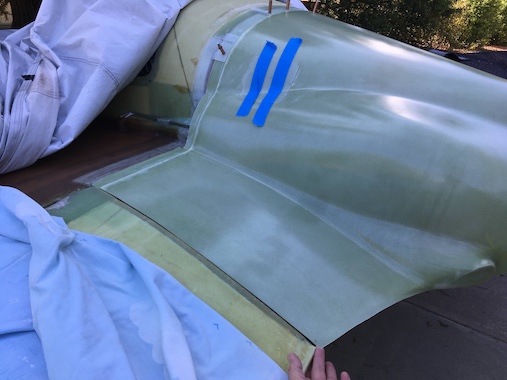 Here is the cowl in place to glass the flange along the turtleback running down on to the center spar. The cowl is held in place at the top with cleco's to the previously made flange on the turtleback, wooden blocks bondo'd to the cowl and the firewall hold up the outboard portions. The aft end of the cowl is resting on the plywood ring attached to the ring gear. The edge of the cowl already lines up fairly nicely with the wing root.
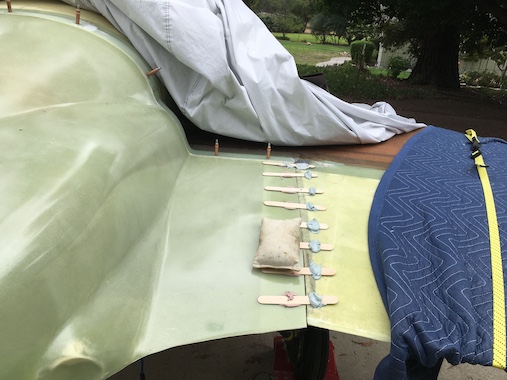
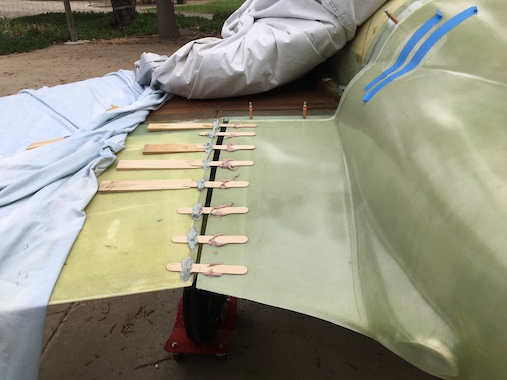 Here the outboard edges of the cowl are bondo'd to the wing root with popsicle sticks to keep the edges aligned. The underside of the cowl has duct tape so the flange is only glassed to the wing root under side. For some reason the left side of the cowl was about a 1/2" short so the flange was made a little wider to make up the gap.
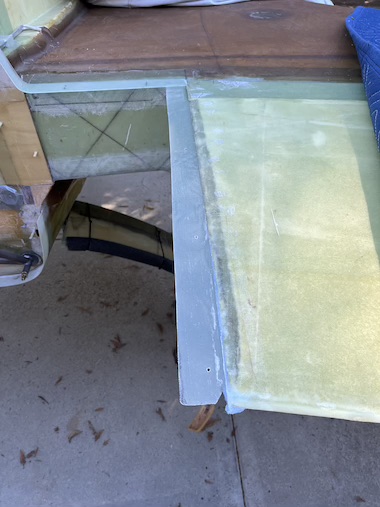
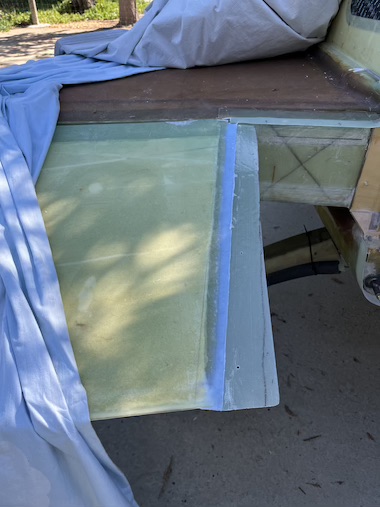 Here are the resulting wing root flanges, they will still get a ply of BID from the top of the wing to the flange. On the left side I leveled the 1/2" gap with flox.
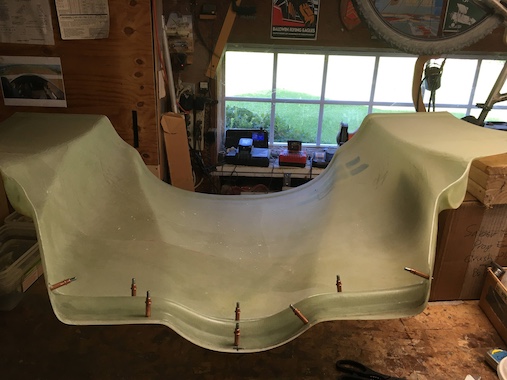
 Here you can see both flanges finished with the extra ply of BID over the top of the wing covering onto the flange. Now the cowl is completely held in place with cleco's.
 Now to do the same with the lower cowl, at least the major layups won't be upside down. Again the edges of the cowl and wing roots are held in alignment with bondo'd popsicle sticks.
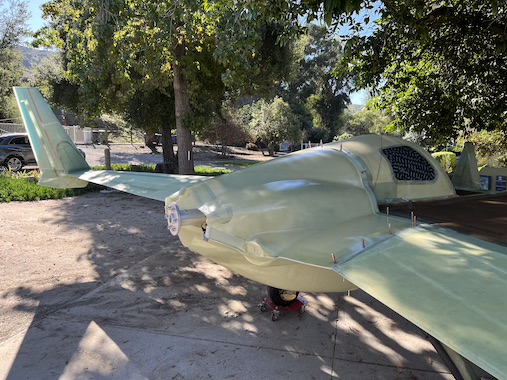
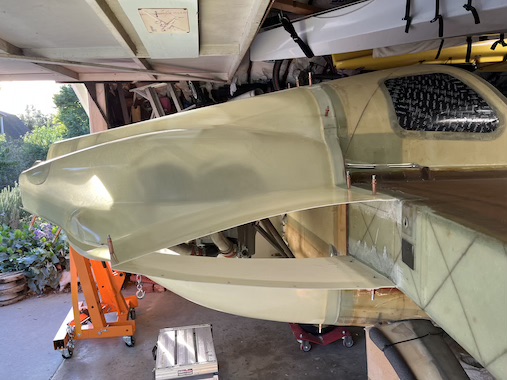
Both upper and lower cowls held in pace by the flanges and cleco's. Trimmed the cowl trailing edges to line up with the wing trailing edges. Only the bulges in the upper and lower cowls for the exhaust pipe exits don't really match, will have to deal with that later.
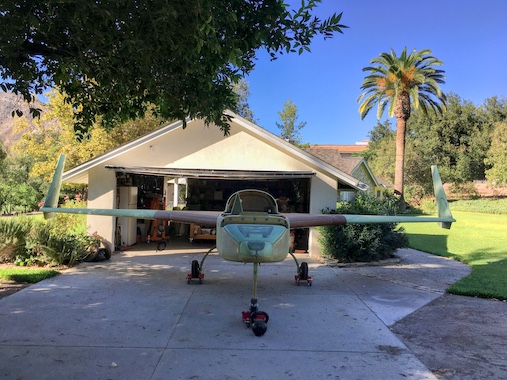
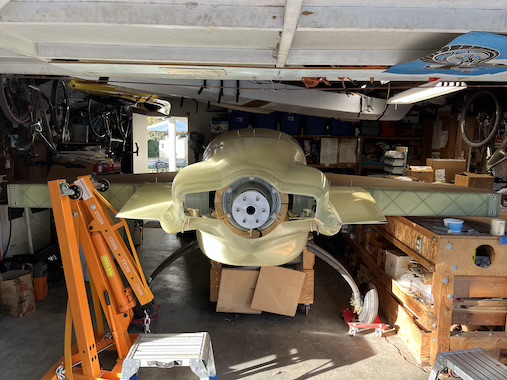
 Some more pictures before removing the wings and putting the plane back in the garage. Note the kettle bell strapped to the nose gear, that, along with another 100 lbs loaded in the footwell area of the fuselage keep the plane from tipping over onto it's tail due to the engine weight.
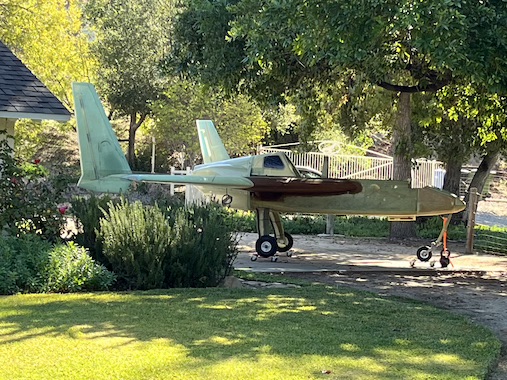
 The airplane safely back in the garage after several weeks outside.
Still more flanges to fabricate on the trailing edges of the upper cowl to fasten the upper and lower cowl together.
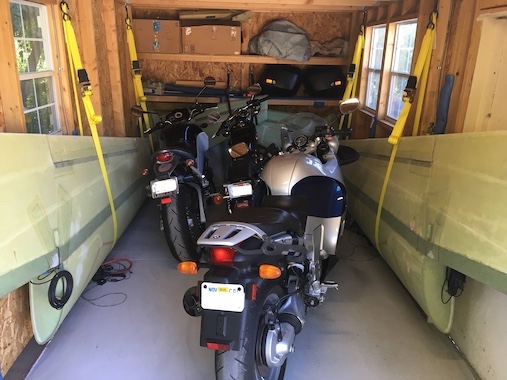
 I call this, "Motorcycles with Wings". The wings go back in the shed with the motorcycles.